I have been using this for a couple months now, during that time I have had ample opportunity to use it on several different kinds of shoot.
So to answer the most relevant question first - Is it worth its price (currently £33.99 incl delivery in the UK)?
Short answer - Yes
It has several features which make it worthwhile, and even without those it would still be a decent buy for that price.
You can vary the amount of light output by use of 2 switches on the back of the light. This means it is not infinitely variable but has a decent number of 'steps' (12) so I didn't find this to be an issue.
It has 2 powering options - 6AA batteries OR 2 Canon NB-3L
There is a mounting plate for these included and you can actually insert this while the light is loaded with AA batteries, which means you can have a 'spare' power source ready to go at all times in the light.
There is a switch on the back of the light which allows you to select which batteries to use as well as giving access to the lights internal charging option. This is the best part for me, the light is also a charger which can connect via its mini USB port to any USB charge/Hub/Computer you have handy. So you can charge with a simple USB cable and not worry about using another 'wall wart adapter'. This was particularly relevant when I was in Japan as I wouldn't have wanted to fit another charger and power supply into my bag. On top of that if you need to remove the batteries to charge them there is a much higher probability they will not be put back in leaving you on a shoot with not batteries.
On each edge there is a mounting point which allows these lights, (and also the smaller version of this light) to be joined together to form a panel with as many lights as you need. The connector also mounts onto the shoe mount found on most DSLRs & video cameras, on the underside of the connector is a hole which allows the light to be screwed onto any standard tripod or Gorilla Pod (which is where this light spent much of its time!).
The light emitted is at 5500k which is in the right range for sunlight and daylight balanced fluorescent bulbs. This one of the few areas for improvement I can see. Light is not always at this colour temperature, (although I favour having a cool light if I have to choose) it would be a great if there was some provision for colour gels to be mounted in front of the light. That way the lights colour temperature could be modified for any situation quickly and easily. It is still possible to tape a gel to the front but it is always less fuss to be able to just drop one into a simple slot on the front.
Finally here is the video review with some sample time-lapse footage at the end and underneath a night test in my garden -
Click here to visit the 7 Day Shop product page
Thursday, 17 November 2011
Tuesday, 8 November 2011
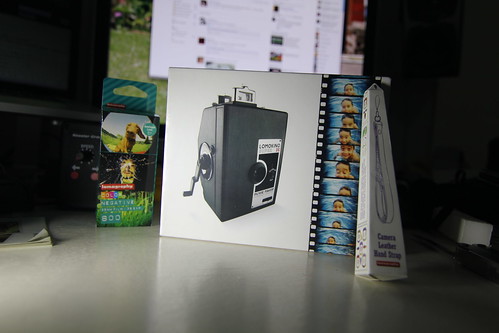
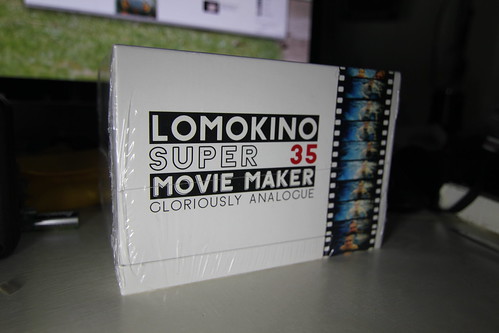
LomoKino un-boxing
The LomoKino has arrived!
As with all Lomography cameras it comes in a very nice box, I opted to get some iso 800 color lomo film to test it out along with some iso 3200 Ilford Black & White I always keep to hand.
As with all Lomography cameras it comes in a very nice box, I opted to get some iso 800 color lomo film to test it out along with some iso 3200 Ilford Black & White I always keep to hand.
YakTrax Pro - Snow grips for shoes
Given the impending 'Big Freeze' I thought it would be a good idea to get hold of some snow grips, mainly due to the fact my wife is pregnant and I would like her not to fall over and break something on the ridiculously icy pavements we have had for the past 2 years.
As an aside 2 years ago we were leaving her parents house after dinner and a man (a inebriated man with a very smelly kebab) fell over on the ice next to our car. We went to see if he was okay but he couldn't get up, turns out he broke the bones in his shin/ankle so bad the pierced the skin leaving his foot wobbling about at the end of his leg.
Now he may have been drunk but it doesn't take much to fall over and I was shocked at how thoroughly snapped his leg was.
On that pleasant anecdote I give you the Yaktrax Pro!
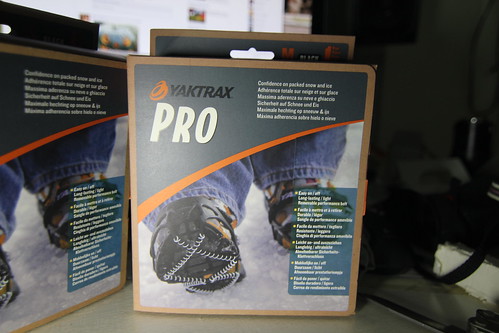
These strap onto your shoes and apparently increase traction on ice and compacted snow dramatically. The 'Pro' version seen here adds a strap across the toe of you shoes and is about £4 or £5 more expensive than the standard YackTrax.
Now there are many different makes of snow grips for shoes, most opt for metal studs/spikes.
The Yaktrax are a bit different as the have a system of clever metal coils which bite into the ice/snow and give grip in all directions.
Crucially they are reported to be fairly easy to walk on when surfaces happen to be free of ice/snow. This is great as the pavements can be very variable and also when going shopping taking them on and off every 5 minutes would could get tedious, most spike/stud based systems leaving you rocking around on ice free surfaces.
Unfortunately we have no snow or ice to test them out but I will post an update when the conditions allow for testing.
P.S. we called an ambulance, wrapped some blankets around him and kept him conscious till they arrived so all was ok in the end...
As an aside 2 years ago we were leaving her parents house after dinner and a man (a inebriated man with a very smelly kebab) fell over on the ice next to our car. We went to see if he was okay but he couldn't get up, turns out he broke the bones in his shin/ankle so bad the pierced the skin leaving his foot wobbling about at the end of his leg.
Now he may have been drunk but it doesn't take much to fall over and I was shocked at how thoroughly snapped his leg was.
On that pleasant anecdote I give you the Yaktrax Pro!
These strap onto your shoes and apparently increase traction on ice and compacted snow dramatically. The 'Pro' version seen here adds a strap across the toe of you shoes and is about £4 or £5 more expensive than the standard YackTrax.
Now there are many different makes of snow grips for shoes, most opt for metal studs/spikes.
The Yaktrax are a bit different as the have a system of clever metal coils which bite into the ice/snow and give grip in all directions.
Crucially they are reported to be fairly easy to walk on when surfaces happen to be free of ice/snow. This is great as the pavements can be very variable and also when going shopping taking them on and off every 5 minutes would could get tedious, most spike/stud based systems leaving you rocking around on ice free surfaces.
Unfortunately we have no snow or ice to test them out but I will post an update when the conditions allow for testing.
P.S. we called an ambulance, wrapped some blankets around him and kept him conscious till they arrived so all was ok in the end...
Thursday, 3 November 2011
LomoKino - Analogue 35mm 'movie' camera
I have just ordered a LomoKino!
Very curious about this, it is a crank driven movie camera that accepts normal 35mm films!
There will be a full review and test footage when it arrives... hopefully soon....

Very curious about this, it is a crank driven movie camera that accepts normal 35mm films!
There will be a full review and test footage when it arrives... hopefully soon....

Sunday, 30 October 2011
Zippo Hand Warmer - Review by Tastes Like Tech
As any guitarist/musician who has to on occasion perform outside will know playing with cold fingers is no fun apart from being difficult to actually play it can be rather uncomfortable.
In the past I have tried re-usable gel packs that can be obtained at most hiking/camping shops. These do work but have a couple of annoying drawbacks, firstly they don't last very long and secondly they are a bit of a fiddle to 'recharge'. The process involves boiling in pans of water whilst taking care to keep them off the bottom of the pan, which may not seem so bad but I never seem to have one ready when I need it.
Step in the Zippo Hand Warmer! It is powered by lighter fuel and on a full 'tank' it will stay warm for up to 12 hours!!! On top of that it will keep a pretty much constant temperature during that time, (not rapidly heating up and then after 40mins rapidly cooling down like the gel packs).
I must admit the idea of carrying burning lighter fuel in my pocket sounded mad at first, but over the past few weeks I have used it at various outdoor gigs and not burned to death!
As it is made by Zippo I think we can assume it doesn't have a track recorded of dooming its owners to a fiery demise - they wouldn't be selling them if this were the case.
It is easy enough to use.
Filling it takes moments.
Fairly stylish in its simple construction (though picks up finger prints like a cop in CSI Miami... YEAAAAAAHHHHHH)
Long run time and you could carry more fuel if you are camping etc.
Tuesday, 25 October 2011
Graffiti Time-Lapse
A few weeks ago I was getting my hair cut and my stylist (yeah I have a stylist...) mentioned that he was opening a place of his own and that they were going to get a couple of artists to paint a graffiti mural. Long story short I wanted to shoot a timelapse of it and this is the result -
Setup everything very carefully as always to avoid flickering. So I couldn't work out where the flickering in some shots came from! Turns out the sun shining on cars driving past the window caused the light shifts and therefore flicker....
The Salon is called Ko and it is on Suffolk Road in Cheltenham.
www.kohairdressing.co.uk
Sunday, 16 October 2011
Canon Powershot A480 Infrared Mod Review
Over the past few years I have been vaguely aware that you could load infrared films into cameras, though I had never tried it.
During a family get together recently my wife's uncle, (a professional photographer) showed me a modified micro 4/3rds camera. I believe it was a Panasonic DMC GF3.
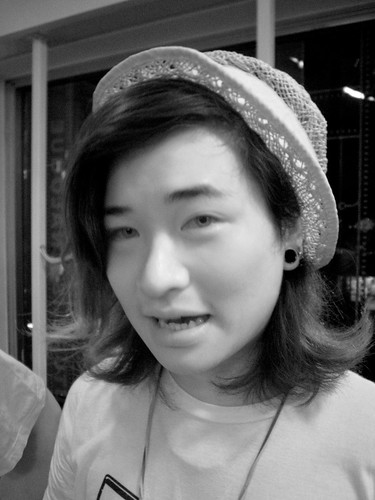
Turns out that leaves, grass etc. turn a vivd white in IR (infra-red) photos and clouds become very well defined as the sky looks somewhat darker. People are also affected eyes look a little 'ghostly' and clothes/hair can take on a different tone.

I really wanted to try out an IR modded camera on a timelapse shoot, after scouring ebay I found a seller who mods them himself - infraready
He was extremely helpful and rushed out a Canon Powershot A480 which arrived just in time for my Japan trip.
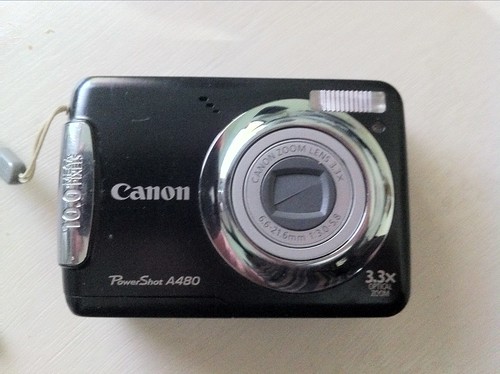 The A480 came out in 2009 so its a couple of years old and was never the best camera around, but it is cheap and for the purposes of modding with a view to making some IR time-lapses it was fine.
It has a 10mp sensor and shooting at the highest resolution is more than sufficient for even 1080p HD video.
On most digital cameras there is a permanent filter in place which blocks light in the infrared spectrum. On these modded cameras the filters are removed.
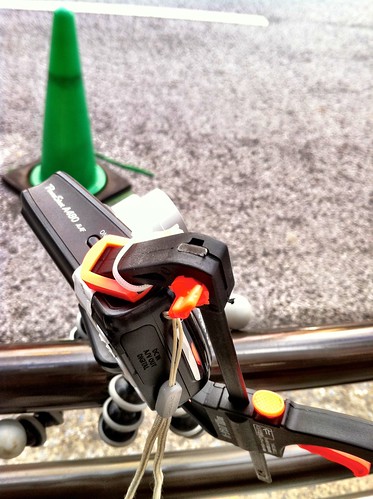
It was my intention to install the CHDK firmware hack which would enable time-lapse shooting. There was precious little time to attempt this before I left for Japan and although I installed the firmware successfully I could not get the time-lapse scripts working.
This scuppered my plans of shooting infrared time-lapses until I came up with the idea of using a clamp to hold the shutter button down in continuous shooting mode.
This gave me no control over the interval but it was quick and it worked!
I'm sure I'll get all the firmware working now I'm but I just didn't have time to spends playing with settings etc. whilst in Japan with lots of other things to do.
On some of the shots in the video below I ran the camera with the CHDK hack active for control of focus and some other parameters. In the last shot I used the camera with standard firmware.
During a family get together recently my wife's uncle, (a professional photographer) showed me a modified micro 4/3rds camera. I believe it was a Panasonic DMC GF3.
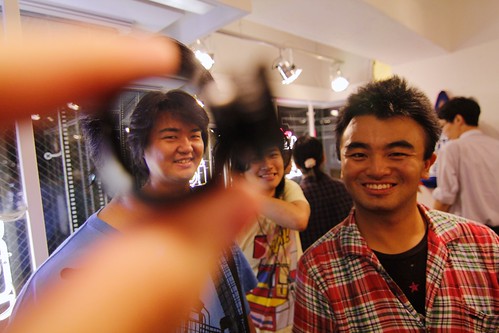
Turns out that leaves, grass etc. turn a vivd white in IR (infra-red) photos and clouds become very well defined as the sky looks somewhat darker. People are also affected eyes look a little 'ghostly' and clothes/hair can take on a different tone.
My friends in the photo have very dark hair in real life!
In this shot Hiro is actually wearing a black t-shirt
And another example of IR eyes courtesy of Mijonju Check out his Blog
I really wanted to try out an IR modded camera on a timelapse shoot, after scouring ebay I found a seller who mods them himself - infraready
He was extremely helpful and rushed out a Canon Powershot A480 which arrived just in time for my Japan trip.
The A480 came out in 2009 so its a couple of years old and was never the best camera around, but it is cheap and for the purposes of modding with a view to making some IR time-lapses it was fine.It has a 10mp sensor and shooting at the highest resolution is more than sufficient for even 1080p HD video.
On most digital cameras there is a permanent filter in place which blocks light in the infrared spectrum. On these modded cameras the filters are removed.
It was my intention to install the CHDK firmware hack which would enable time-lapse shooting. There was precious little time to attempt this before I left for Japan and although I installed the firmware successfully I could not get the time-lapse scripts working.
This scuppered my plans of shooting infrared time-lapses until I came up with the idea of using a clamp to hold the shutter button down in continuous shooting mode.
This gave me no control over the interval but it was quick and it worked!
I'm sure I'll get all the firmware working now I'm but I just didn't have time to spends playing with settings etc. whilst in Japan with lots of other things to do.
On some of the shots in the video below I ran the camera with the CHDK hack active for control of focus and some other parameters. In the last shot I used the camera with standard firmware.
Thursday, 13 October 2011
So what was I doing in Japan?!
For most of September I was touring in Japan, for those who don't know I am actually an acoustic guitarist as well as a camera/technology addict.
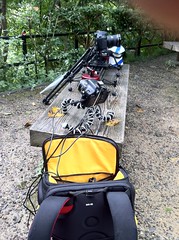
This year alongside my playing I though that it would be fun to do a big timelapse project so I lugged about 30KG of photographic equipment to Japan along with me, the mac and my guitar.
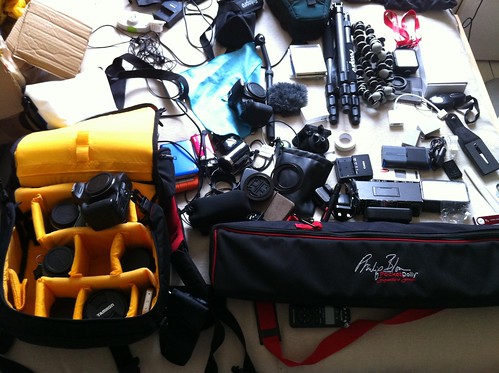
This included a few pieces of equipment I had for review - some video lights, white balance cards, audio recorder etc. (those should be coming out very soon...)
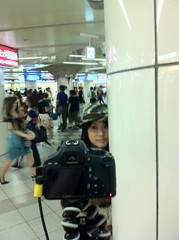
So when I wasn't playing gigs with Japanese metal, pop punk bands....


...and chilling with fans

:o
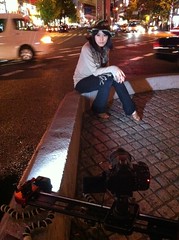
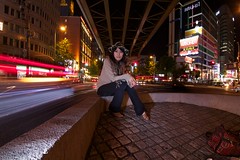
I was sitting or standing for hours listening to a camera shutter fire every few seconds, perhaps with the added twist of the motorised dolly moving.


This year alongside my playing I though that it would be fun to do a big timelapse project so I lugged about 30KG of photographic equipment to Japan along with me, the mac and my guitar.
This included a few pieces of equipment I had for review - some video lights, white balance cards, audio recorder etc. (those should be coming out very soon...)
So when I wasn't playing gigs with Japanese metal, pop punk bands....
...and chilling with fans
:o
I was sitting or standing for hours listening to a camera shutter fire every few seconds, perhaps with the added twist of the motorised dolly moving.
Youtube Collaborations with Hanafubuki / Yokomaririn
I can't remember exactly how I first found Yoko's videos, perhaps it was a fortuitous related video I followed from the video of another jvlogger I was subbed to.... However it happened I am very glad it did because under the Hanafubuki banner Shibata Yoko and Tohdo Naoki have made some stunning videos.
On previous visits to Japan I have been fortunate enough to meet them and I have been mentioned in a few videos which you can view below.
This year we actually set out to make a collaboration video which is still being edited but is nearing completion...

it was a fun shoot around Umeda in Osaka despite some heavy rain forcing changes to planned locations.
Later in the trip I visited Kyoto and we spontaneously met up when I was out shooting more time-lapses around the city. Ate some great Tempura and Noodles, after which I actually got to feature in a 'Snack time' video featured on the Yokomaririn Channel
I look tired and slightly scruffy as I had only planned to be behind the camera that day!
Here are more videos from Yoko sans channels which feature me in some way ; )
On previous visits to Japan I have been fortunate enough to meet them and I have been mentioned in a few videos which you can view below.
This year we actually set out to make a collaboration video which is still being edited but is nearing completion...
it was a fun shoot around Umeda in Osaka despite some heavy rain forcing changes to planned locations.
Later in the trip I visited Kyoto and we spontaneously met up when I was out shooting more time-lapses around the city. Ate some great Tempura and Noodles, after which I actually got to feature in a 'Snack time' video featured on the Yokomaririn Channel
I look tired and slightly scruffy as I had only planned to be behind the camera that day!
Here are more videos from Yoko sans channels which feature me in some way ; )
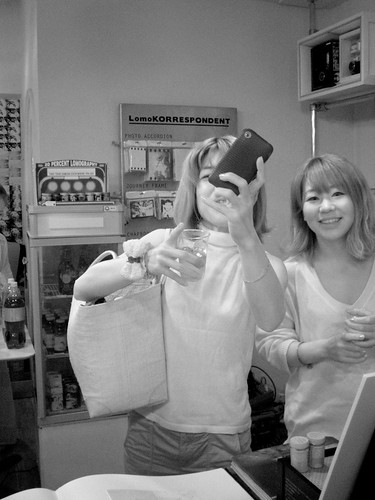
Meeting Youtubers at the Lomography Store in Tokyo!
Whilst I was in Japan I had the honour of meeting several fellow youtubers and I even made a couple of collaboration videos with one of them!
First up Minjonju
We share an interest in cameras and photography though my knowledge and skill pales in comparison to his!
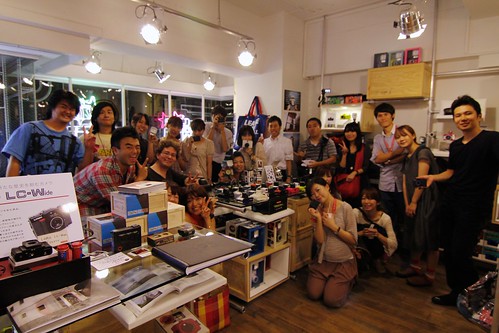
I have actually featured in a couple of his videos before which you can view below, I owe him a big thanks for helping set up my gig at the Tokyo Lomography Store in Harajuku.

It was a very enjoyable gig surrounded by all the Lomo finery and I also got to meet Japanese techblogging legend Jetdaisuke!
First up Minjonju
We share an interest in cameras and photography though my knowledge and skill pales in comparison to his!
I have actually featured in a couple of his videos before which you can view below, I owe him a big thanks for helping set up my gig at the Tokyo Lomography Store in Harajuku.
It was a very enjoyable gig surrounded by all the Lomo finery and I also got to meet Japanese techblogging legend Jetdaisuke!
Bristol Balloon Fiesta 2011
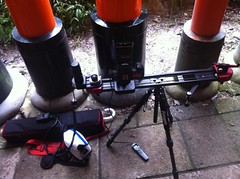
I decided to head down to Bristols annual Hot Air Balloon extravaganza and shoot some timelapse videos of the Balloons inflating and taking off.
I had enquired before hand about getting access to the press/media area in order to get better shots as the spectators are not allowed in the arena where all the balloons inflate. Unfortunately they had filled the quota etc. for the event..... not to be discourage I got up bright and early for one of the 6am launches arriving on site before 5am.
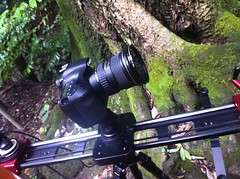
Through the use of Jedi mind tricks and an ability of being able to act like I'm meant to be 'backstage' gleaned from countless concerts/festivals etc. I managed to get into the arena and capture the following timelapses with the use of various cameras, lenses and a Kessler Crane PB Dolly.
The weather was not ideal for the launch, also the clouds were 'boring' from a timelapse point of view for most of the morning.
The following day I returned with my family and shot this sequence from a hill at the side of the arena that I had scoped out the previous day.
I had enquired before hand about getting access to the press/media area in order to get better shots as the spectators are not allowed in the arena where all the balloons inflate. Unfortunately they had filled the quota etc. for the event..... not to be discourage I got up bright and early for one of the 6am launches arriving on site before 5am.
Through the use of Jedi mind tricks and an ability of being able to act like I'm meant to be 'backstage' gleaned from countless concerts/festivals etc. I managed to get into the arena and capture the following timelapses with the use of various cameras, lenses and a Kessler Crane PB Dolly.
The weather was not ideal for the launch, also the clouds were 'boring' from a timelapse point of view for most of the morning.
The following day I returned with my family and shot this sequence from a hill at the side of the arena that I had scoped out the previous day.
Tuesday, 26 July 2011
Just Arrived! Little Bramper


Little Bramper - Bulb Ramping intervalometer, a set on Flickr.
I have just received a Little Bramper!
This little device acts as a timelapse timer/intervalometer.
But thats not the good part, it allows you to smoothly vary the exposure time. This means you can get amazing Sunrise/Sunset time-lapses.
It is available in limited runs here http://www.thewhippersnapper.com/LittleBramper/Site/Home.html
Thursday, 21 July 2011
Call Me - arr. Dale Campbell
Not 'tech' on the face of it but this is a new video from my music channel.
I shot this with;
Canon 550D
Sigma 30mm f1.4 prime lens
Some daylight balanced energy saving bulbs
A couple of dark blue 'fleece' blankets for the Black background
A Kessler Crane Philip Bloom Pocket Dolley (no dolly shots made it to the final cut)
For the wide shots of me I use the 550D 'vertically' in portrait orientation as this gave me the best resolution as I had a lot of wasted space on either side when using the camera in its standard orientation.
This was flipped and resized in post.
In camera I was using the cinestyle picture style and I then graded with Magic Bullet Looks 2 the latest version.
Wednesday, 13 July 2011
Tuesday, 21 June 2011
Final Cut Pro X - overview & first impressions
My quick look at Final Cut Pro X.
In a nutshell -
Some useful features.
Cannot replace previous Final Cut yet due to 64bit re-write making all plugins for Final Cut Obsolete!

Sunday, 19 June 2011
iPhone 4 Tilt Shift Video app reviews
The two apps I am reviewing are
The realtime TiltShiftVideo - http://itunes.apple.com/us/app/realtime-tiltshift-video/id425615921?mt=8
and the post processing TiltShift Video - http://itunes.apple.com/us/app/tiltshift-video/id395953517?mt=8
The realtime TiltShiftVideo - http://itunes.apple.com/us/app/realtime-tiltshift-video/id425615921?mt=8
and the post processing TiltShift Video - http://itunes.apple.com/us/app/tiltshift-video/id395953517?mt=8
Both apps allow you to easily manipulate the tilt-shift effect and offer a number of other options to enhance colours etc.
I definitely prefer the post processing TiltShift Video app, it allows so much more flexibility enabling you to capture video in another recorder app such as the standard camera or iTimeLapse etc.
And then it renders and exports at the maximum 720p resolution.
Saturday, 18 June 2011
Some examples - Orestor f2.8 135mm


Orestor f2.8 135mm - Meyer Optik Gorlitz, a set on Flickr.
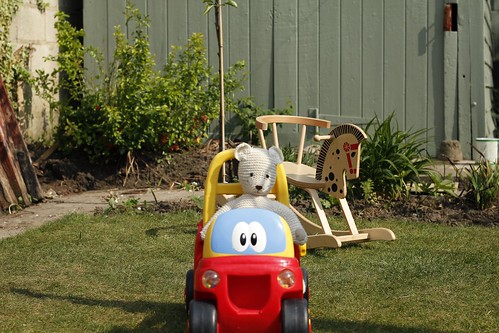
Here are some tests shots I made this afternoon.
The two shots of the bird feeder are interesting, one is wide open and has a very shallow depth of field. The other was stopped down and you can see more detail in the out of focus areas.
I also tried photographing my son, a fast moving target. Found that I had to stop down as it was very difficult to alter focus fast enough and keep him framed given the focal length this lens is giving me on the 550D.
But once I got used to it I managed to get some really nice shots that were plenty sharp and in focus where they needed to be.
Orestor f2.8 135mm - Meyer Optik Gorlitz
The M42 screw to Canon EF mount adaptor finally arrived!
Been testing it out and getting used to the 135mm focal range + the 1.6 crop the 550D is adding.
From what I have seen so far I think I am really going to enjoy this lens!
The focus ring does almost a complete turn to get to infinity, which given how shallow the Dof can be seems essential….
test shots and videos to follow soon
Tuesday, 14 June 2011
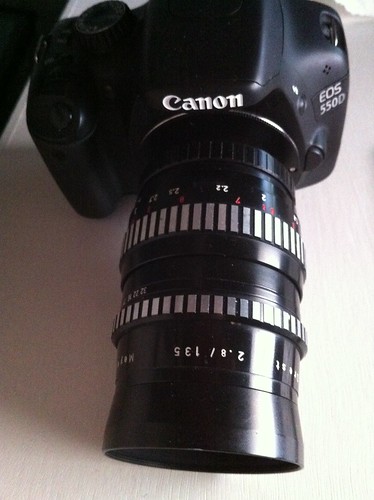
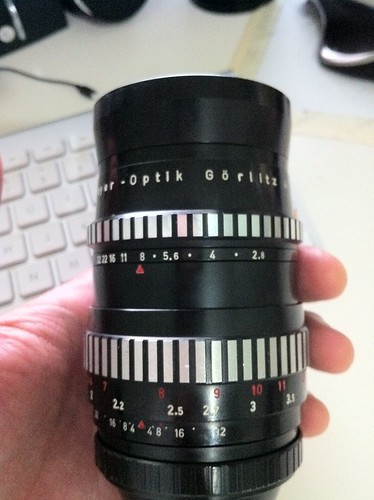
Meyer Optik Görlitz - Orestor 135mm f2.8
New old lens - the Bokeh Monster that is the Orestor 135mm!
I will be doing some reviews and info videos about this and other older lenses.
Just waiting for the M42 screw to Canon EOS adaptor....
Its in really good condition and wasn't too over priced, this lens has become very popular lately so the can go for a silly amount.
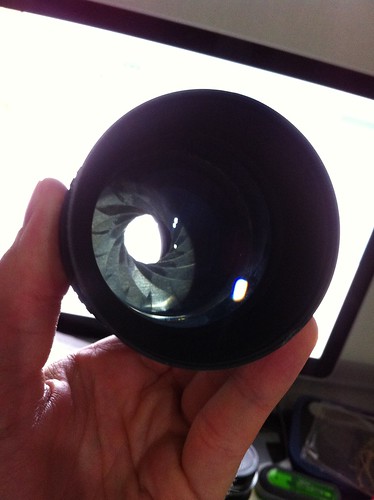
The 15 blade aperture is very smooth and has no hard stops, can't wait to test it!
I will be doing some reviews and info videos about this and other older lenses.
Just waiting for the M42 screw to Canon EOS adaptor....
Its in really good condition and wasn't too over priced, this lens has become very popular lately so the can go for a silly amount.
The 15 blade aperture is very smooth and has no hard stops, can't wait to test it!
Sunday, 5 June 2011
App Review - Fire 2 Field Recorder
I use the FiRe field recorder application almost daily. So When I heard that they had a new improved version I had to check it out!
It will cost you to download the new version as it is not a free upgrade, this isn't a deal breaker for me but in general I know a lot of people get annoyed when app devs upgrade to a new version of the app that has to be payed for.
There are a few interface tweaks and in general everything is a little more polished. The app now has an effects section which will be handy for anyone needing to add some quick fine tuning to recordings.
They have also added 48KHz recording which is huge for anyone working with video as it means you can now use the iphone to capture audio and be able to sync it to the cameras audio.
You are also now able to upload to dropbox alongside soundcloud and ftp.
I use the soundcloud uploading a lot and probably won't use the dropbox feature but its nice to have.
All together a worthwhile upgrade and if you are new to the app I would go for this version, for the majority of casual users the updates in this version wouldn't really be worth the extra cost.
Monday, 23 May 2011
Saturday, 21 May 2011
FAQ NO. 6 - Colour Correction / Grading in my videos
I posted this video on my 'main' YouTube channel as part of the FAQ series, it seems relevant here though.
Colour correction was done with Magic Bullet Looks, it's a great plugin and is surprisingly easy to use.
The only downside would be that it is fairly expensive if you are misting editing videos for fun!
Colour correction was done with Magic Bullet Looks, it's a great plugin and is surprisingly easy to use.
The only downside would be that it is fairly expensive if you are misting editing videos for fun!
Wednesday, 18 May 2011
Filmic Pro App Review
This is a really nice app which allows you to control some essential aspects of your video.
Very easy to use, the exposure and focus points can be dragged around the screen making it easy to select thee area you want to take your locked settings from.
The fact this app also allows you to control the frame rate going down increments of 1 from 30fps is great if you are looking to match footage from several cameras to the iPhone.
Currently on the UK app store for £1-79 and worth every penny!
I will post some outdoor test footage soon....
Tuesday, 10 May 2011
Thursday, 21 April 2011
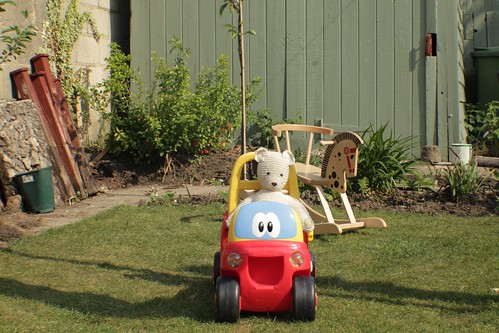
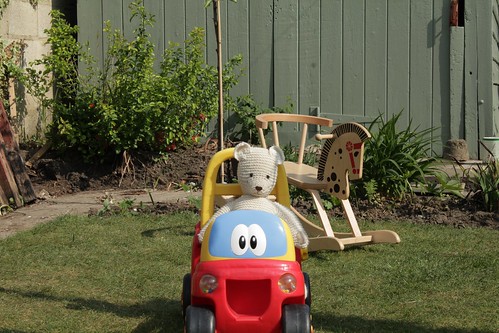
Lens field of view comparisons
This is a quick test I did this afternoon to compare the field of view with each of the different lens I use.
The sun dipped behind some clouds at one point so don't take this too seriously for colour etc.
The photos are available at the original resolution on flickr if you wanted to look in more detail.
All photos were taken with these settings
iso 100
shutter speed 1/50
f14
Only the focal length was varied.
I aimed to keep focus on Art-bear-funkel (the bear... thats his name)
Camera was a Canon 550D (T2i to Americans, Kiss X4 to people in Asia)
Lens used were -
Canon EF 50mm f1.8 II
Tokina SD 11-16 f2.8 (IF) DX
Sigma EX 30mm f1.4
Canon EF-S 18-55 Zoom Lens f3.5-5.6 IS
I also stuck a cheap wide angle adaptor on the canon 50mm prime just to see : )
During these tests I shot some video for each lens/setting and also conducted the same tests with and ND fader to observe DOF variations. These will all be up soon...
In the meantime please leave any questions or comments below.
50mm Canon f1.8
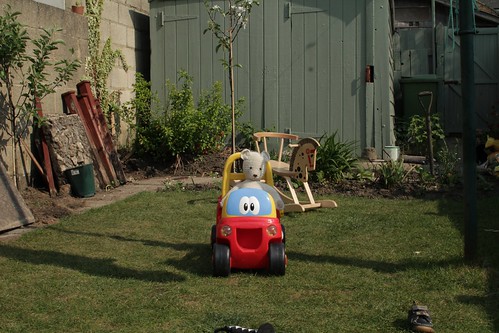
Canon 50mm f1.8 with cheap wide angle adaptor
(seems to make it about 42mm equivalent)
30mm Sigma f1.4
Tokina 11-16mm f2.8 @16mm
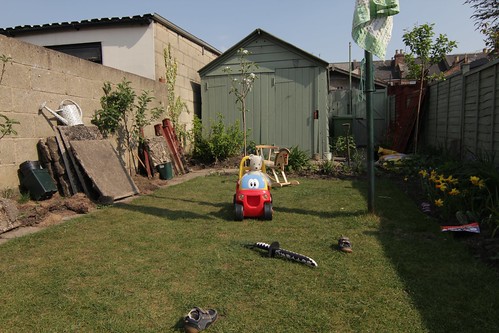
Tokina 11-16mm f2.8 @11mm
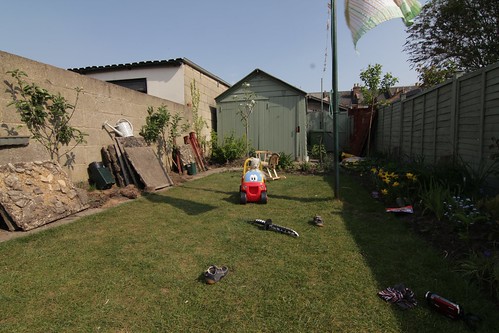
Canon 18-55mm Kit Lens @ 18mm
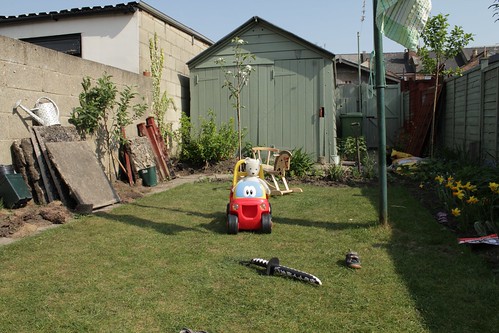
Canon 18-55mm Kit Lens @ 42mm
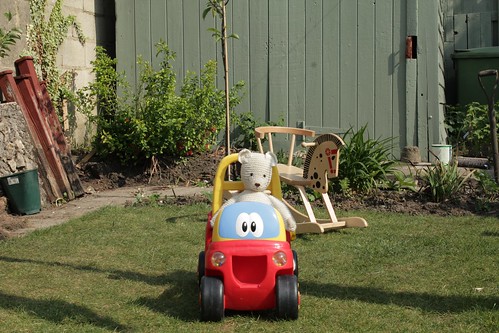
Canon 18-55mm Kit Lens @ 55mm
The sun dipped behind some clouds at one point so don't take this too seriously for colour etc.
The photos are available at the original resolution on flickr if you wanted to look in more detail.
All photos were taken with these settings
iso 100
shutter speed 1/50
f14
Only the focal length was varied.
I aimed to keep focus on Art-bear-funkel (the bear... thats his name)
Camera was a Canon 550D (T2i to Americans, Kiss X4 to people in Asia)
Lens used were -
Canon EF 50mm f1.8 II
Tokina SD 11-16 f2.8 (IF) DX
Sigma EX 30mm f1.4
Canon EF-S 18-55 Zoom Lens f3.5-5.6 IS
I also stuck a cheap wide angle adaptor on the canon 50mm prime just to see : )
During these tests I shot some video for each lens/setting and also conducted the same tests with and ND fader to observe DOF variations. These will all be up soon...
In the meantime please leave any questions or comments below.
50mm Canon f1.8
Canon 50mm f1.8 with cheap wide angle adaptor
(seems to make it about 42mm equivalent)
30mm Sigma f1.4
Tokina 11-16mm f2.8 @16mm
Tokina 11-16mm f2.8 @11mm
Canon 18-55mm Kit Lens @ 18mm
Canon 18-55mm Kit Lens @ 42mm
Canon 18-55mm Kit Lens @ 55mm
Subscribe to:
Posts (Atom)